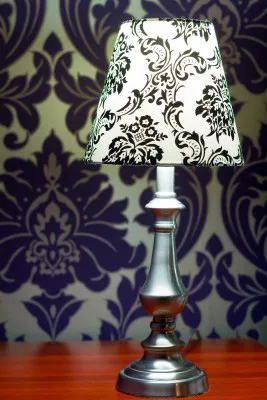
Have a lamp base you love but a shade you could live without? Don’t get rid of it, update it! Whether it’s an old shade or a new one, it can be easy to add a custom touch with colorful fabric and trim. Here’s what you need to know to complete this project.
Supplies You Will Need: What you need will depend on your design, but to be safe, gather together fabric, trim, scissors, paper (news, craft, butcher or brown wrapping), plastic clamps, fabric glue, and of course, lots of creativity.
Step 1: Pick your fabric and/or trim
Look around your home and think about what patterns and colors would compliment your decor, and then shop around for the perfect fit. Depending on the lamp and your style, you may or may not want to add trim around the top or bottom. We have a wide variety of fabric and trim, which can be seen in store or online.
Step 2: Create a template
To create a template, you will need to:
1) Lay your large sheet of paper on a large table or on the floor.
2) Place the lampshade on its side, with the seam touching one end of the paper. Be sure there is enough paper laid out so the shade can make one full transition across it.
3) Starting at the seam of the shade, gradually roll the shade, tracing its path along the top and the bottom as you go. Once the shade has made its way back to the seam, you can stop. Note: A drum shade will leave you with a rectangle and a tapering shade will leave a curved shape on your paper.
4) Draw an additional inch around the pattern on your paper before cutting. This additional inch will be for covering the top and bottom edge of the shade.
Step 3: Cut out the fabric
Lay the fabric face up and place the template on top. Shift the template around until you are satisfied with the position of the pattern, and then pin it in place. Cut the fabric, using the template as your guide, and then test fit the fabric on the shade to see if any trimming needs to be done.
Note: The template can be used to cut the trim as well.
Step 4: Attach the fabric to the shade
Apply craft glue or spray adhesive to the wrong side of the fabric (or trim) and then adhere it to the shade. Tuck the excess fabric over the edges and clamp with clothespins. Let it dry for at least 24 hours before fitting it to the lamp base. Tip: Test the glue on a scrap piece of your fabric to ensure it doesn’t soak through, discolor or leave spots.
Visit us at INTERIOR FABRICS to see our latest discount designer fabrics to make your next project go quick ad smooth!